Trench Drain Installation:
A Step-by-Step Guide
Trench Drain Installation:
A Step-by-Step Guide

<p><strong>Table of contents</strong></p><ul><li>Typical Equipment for a Trench Drain Installation</li><li>Step-by-Step Guide: How to Install a Trench Drain</li><li>Step 1: Excavate a trench to accommodate the drain system</li><li>Step 2: Cut drainage channels and/or grates to the correct size</li><li>Step 3: Prepare the pipe connections</li><li>Step 4: Position the Trench Drains correctly</li><li>Step 5: Trench Drain Channel Bracing & Concrete Pour</li><li>Step 6: Pavement finishing</li></ul>
Marketing cookies must be accepted in order to view the video.
<p> </p><h2><span class="text--medium"><strong>Typical Equipment for a Trench Drain Installation</strong></span></h2><p>Before beginning a drain channel installation, you require tools for excavating, measuring, and shaping. Essential tools include:</p><ul><li>Excavating equipment</li><li>Levels, including string-line and laser levels</li><li>Measuring tools, square</li><li>Masonry drill, grinder, and/or reciprocating saw</li><li>Rubber mallet and/or hammer</li><li>Concrete - 4,000 psi minimum compressive strength</li><li>Concrete vibrator</li><li>Safety gear, including eye protection, gloves, breathing protection</li><li>Shovel, trowel, and rake</li></ul><p> </p><h2><span class="text--medium"><strong>Step-by-Step Guide: How to Install a Trench Drain</strong></span></h2><p>When you have the necessary equipment, plan the channel drain installation process.</p><ul><li>Take the time to plan your <a href="/en-us/bg-blog/sustainable-rainwater-management">sustainable rainwater management system</a> in detail.</li><li>Evaluate the best placement of the drain channel on your property. Consider its length and the kit size you need.</li><li>Mark the zones where you plan to cut. Remember: the channel needs a minimum of four inches on either side of the unit. Consult our <a href="/en-us/downloads?group_collection=0&group_item=27&group_product=246&folder=131&nominal_size=">installation details for specific minimum requirements</a> based on your trench drain size.</li></ul>

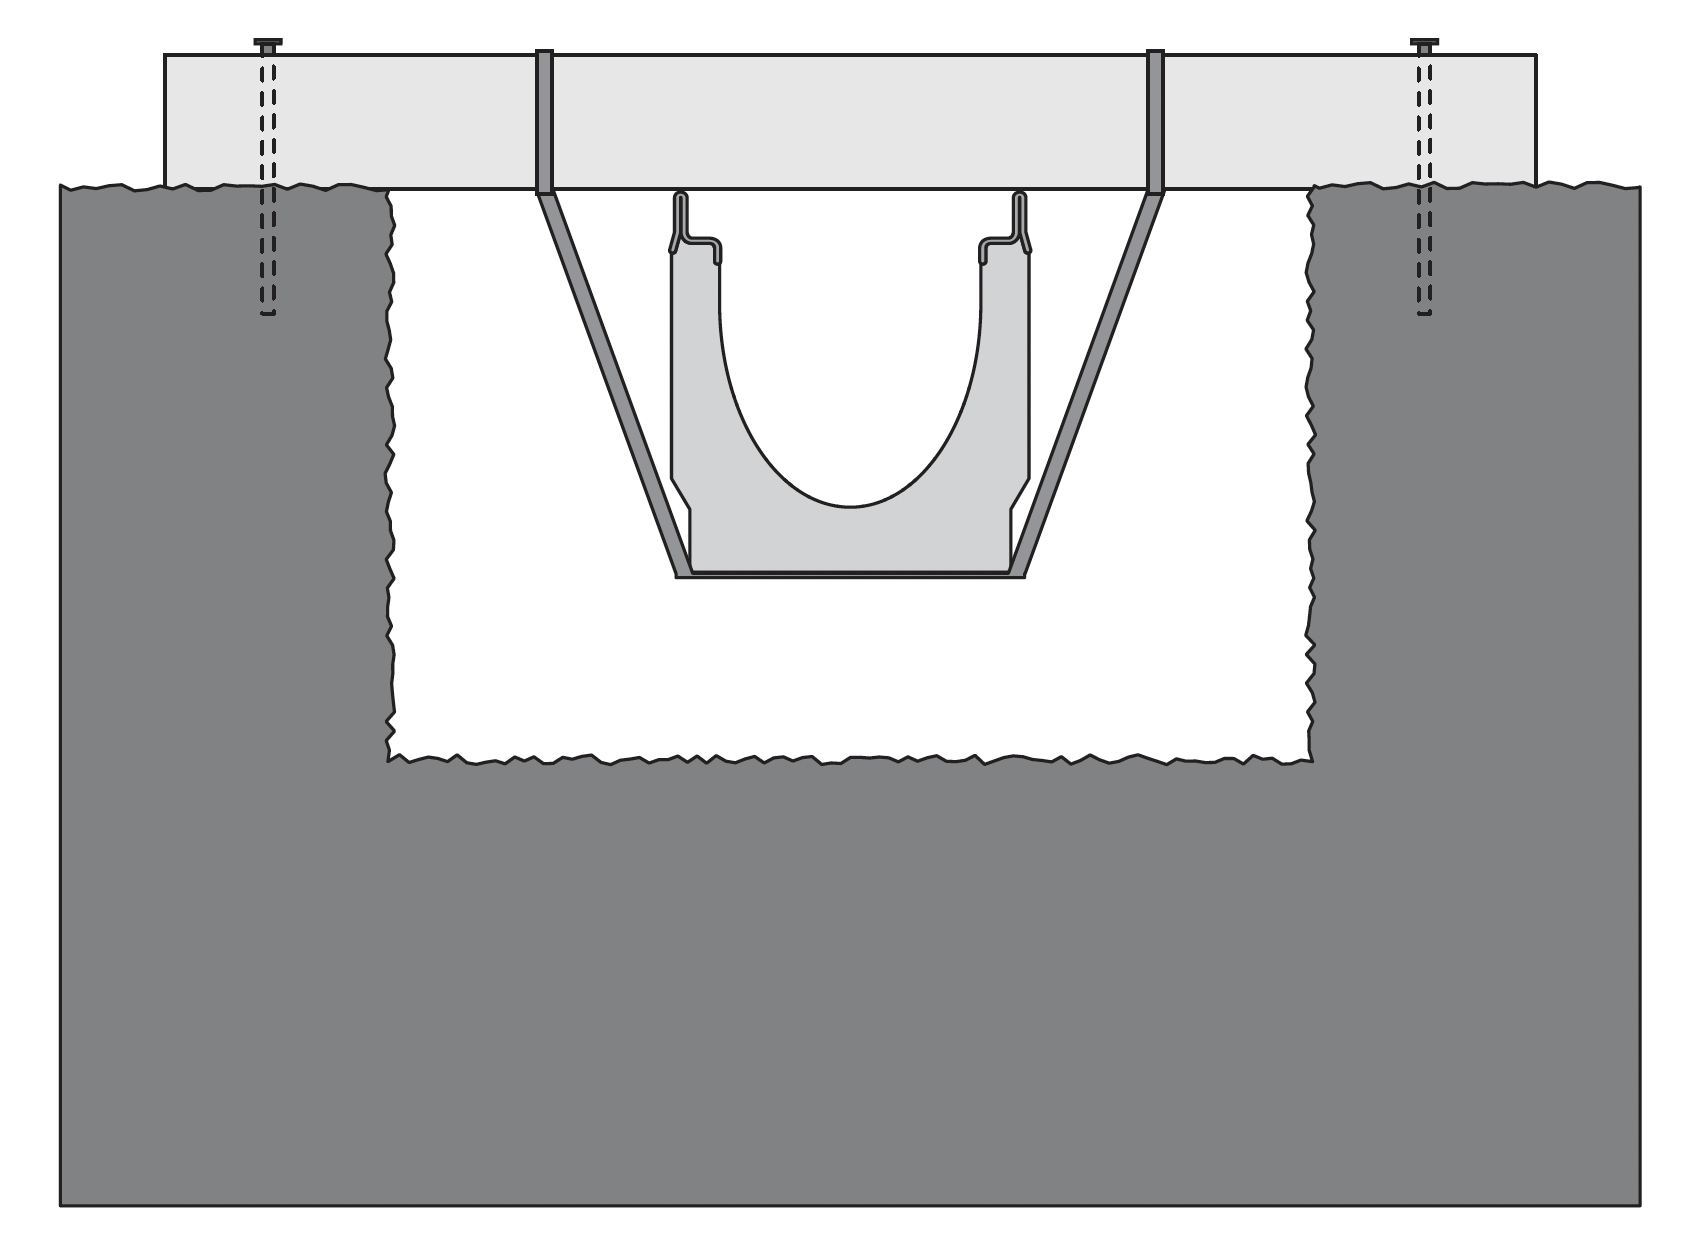
<p>Typical trench profile for channel drain installation</p>
<p>Choosing the correct product is critical. The products used in <a href="/en-us/bg-blog/sustainable-rainwater-management">stormwater retention systems</a> offer specific qualities. Select one that fits the intended use, considering load classes, channel depths, and widths.</p><p>Now, follow these simple steps for an efficient trench drain channel installation:</p><p> </p><h3><span class="text--medium"><strong>Step 1: Excavate a trench to accommodate the drain system</strong></span></h3><p>Start by excavating a trench to fit the <a href="/en-us/trench-drainage">trench drainage</a> system. This trench must be dug around the midsection of the planned drainage run and the catch basin. Consider the following factors as you excavate space in preparation for drain placement:</p><ol><li>The channel/catch basin width and depth measurements</li><li>Required concrete encapsulation</li><li>Compacted gravel base dimensions. Compacting the area surrounding the trench provides the stability needed to install the trench drainage system.</li><li>For sloped, stepped slope, and combined slope systems, excavate the space for the ditch by approximately tracking the slope of the trench drain run.</li></ol><p> </p><p>Next, clear any loose material or debris, add a one-inch layer of gravel, and compact it down. Run a string line or laser level along the trench’s length at the finished surface to ensure the channel drain meets the required standard.</p><p>Consider expansion/control joints when using hardscape surfaces such as concrete pavements. These joints accommodate movement arising from thermal expansion/contraction.</p>
<p><span class="text--height-big text--large"><strong>Remember: </strong></span><span class="text--height-big text--big">Be sure to check and adhere to engineered and site-specific gravel-base principles and local regulations.</span></p>
<h3><span class="text--medium"><strong>Step 2: Cut drainage channels and/or grates to the correct size</strong></span></h3><p>Wear gloves, protective eyeglasses, and respiratory gear when cutting drainage channels to the correct size.</p><p>Mark cut lines on the drain channels as required, including marks to form miters or T-junctions. You can fabricate most installations on-site. Use a masonry or diamond disc saw to cut the channels or a bandsaw to cut grates. Cut channels in line with the calculated angle, then butt them together to form mitered joints.</p><p>For 45-degree angles, you can use standard construction glue to bond the cut surfaces together. Apply adhesive to both ends and push-fit the sides together. Clean excess glue from the inside surface before it hardens.</p>
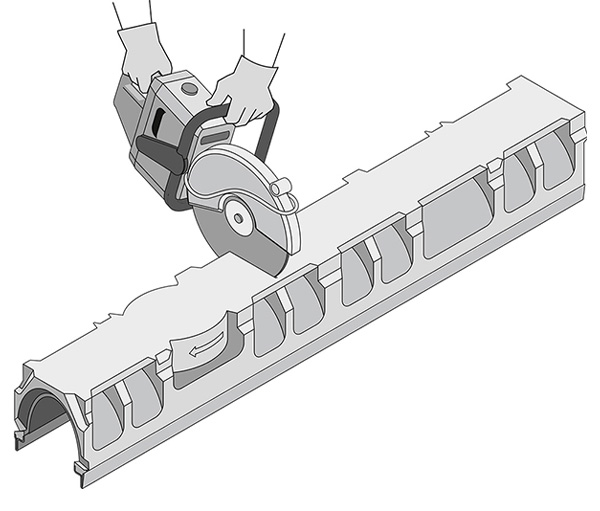
<p>Cutting a trench drain to a smaller length</p>
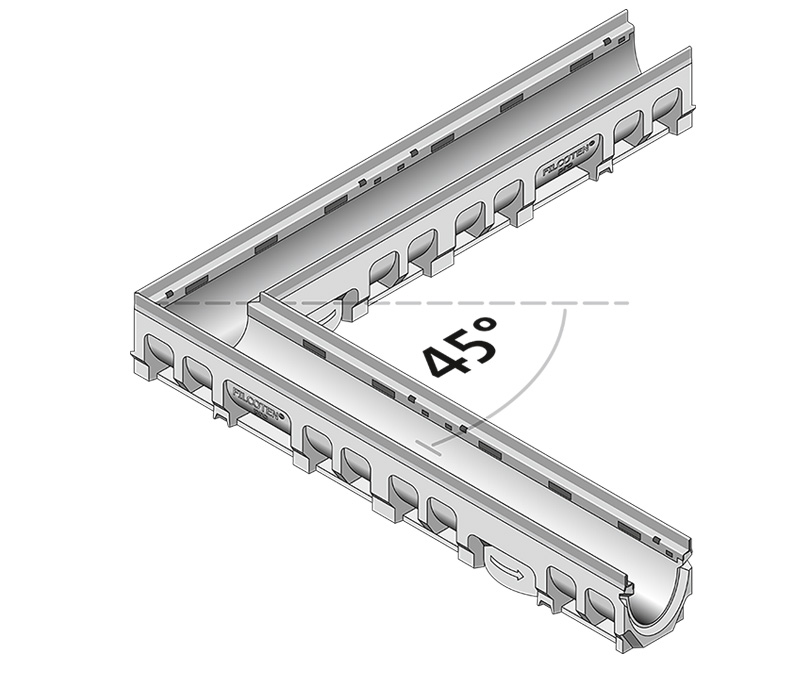
<p>45° miter cuts assembly</p>

<p>T-junction with side perforation</p>
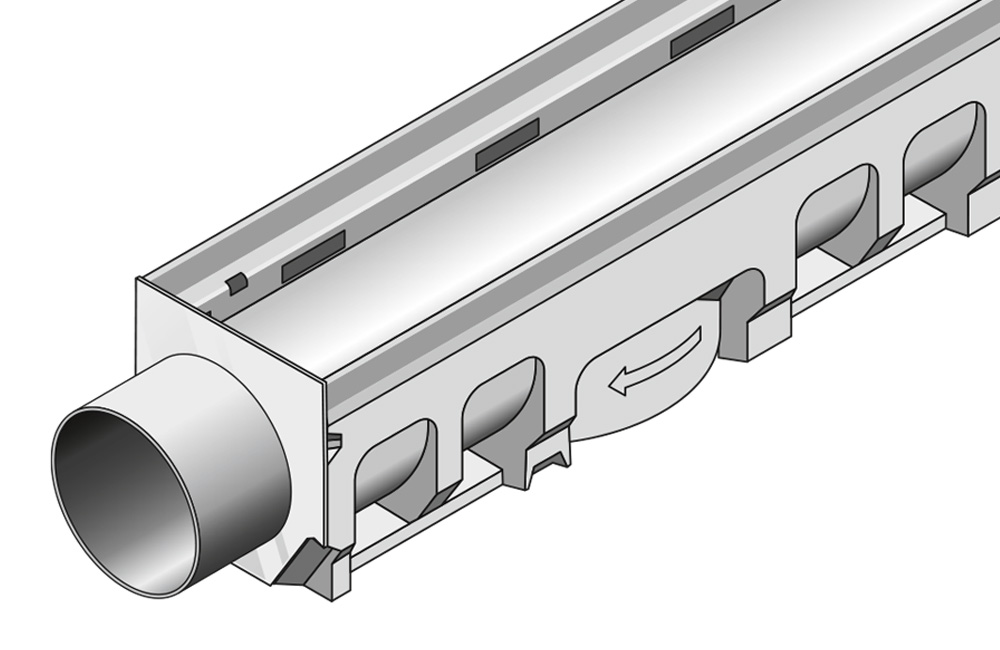
<h3><span class="text--medium"><strong>Step 3: Prepare the pipe connections</strong></span></h3><h4><span class="text--medium text--dark">Option A: Using a Catch Basin</span></h4><p>Firstly, <strong>prepare the catch basin.</strong> 12-inch and1 eight-inch catch basins require a pipe adapter if a cast iron or polyvinyl chloride (PVC) drain pipe is used.</p><p>Connect the outlet pipe to the catch basin adapter using either no hub coupling or corrugated pipe.</p>
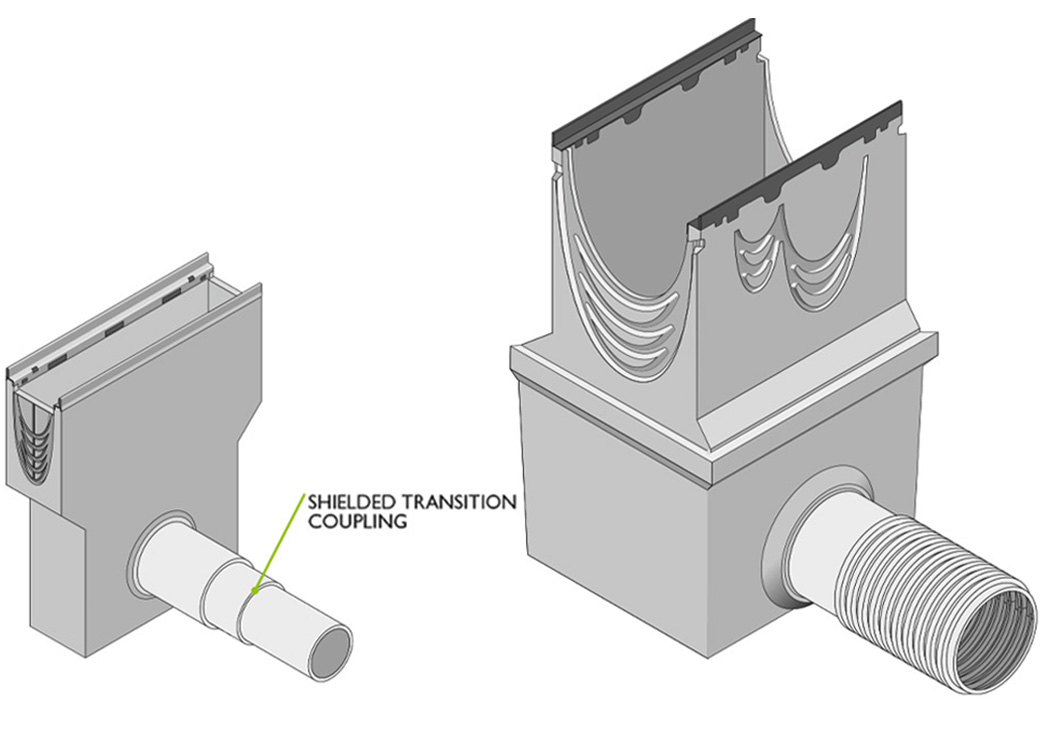
<p>Catch basin pipe coupling</p>
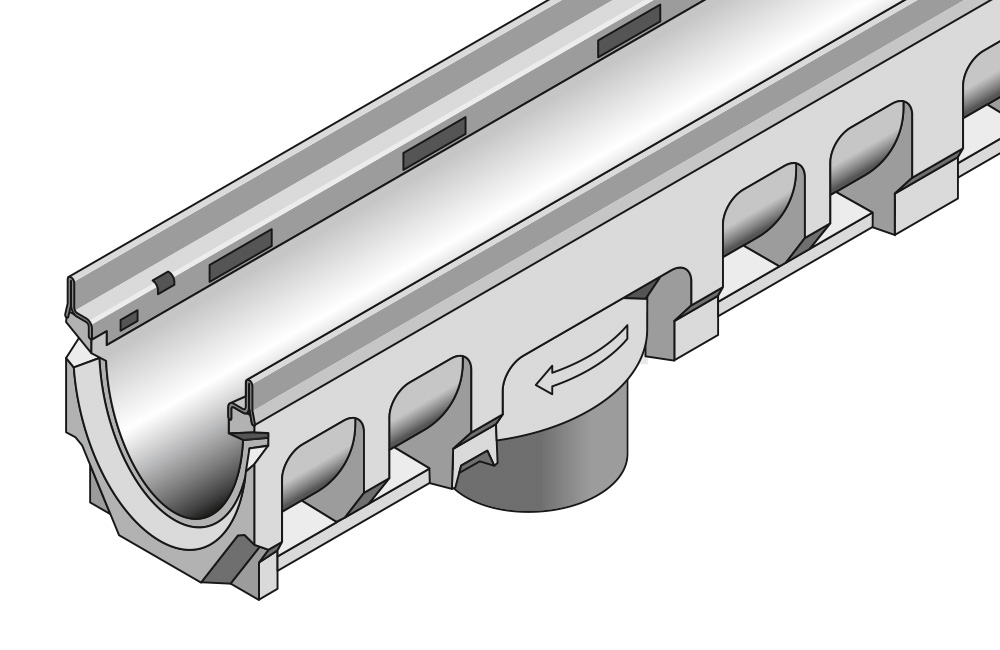
<p>For a catch basin cut-out, mark the area to be removed, then cut the section.</p><ul><li>Use a reciprocating saw/band saw to cut the opening to the required channel connection height.</li><li>Finish the corners using a grinder for proper fitting.</li><li>Position the channels in the socket. Seal using the standard construction adhesive.</li></ul>
<p>catch-basin socket cut-out</p>
<p>Aligning channel with catch basin</p>
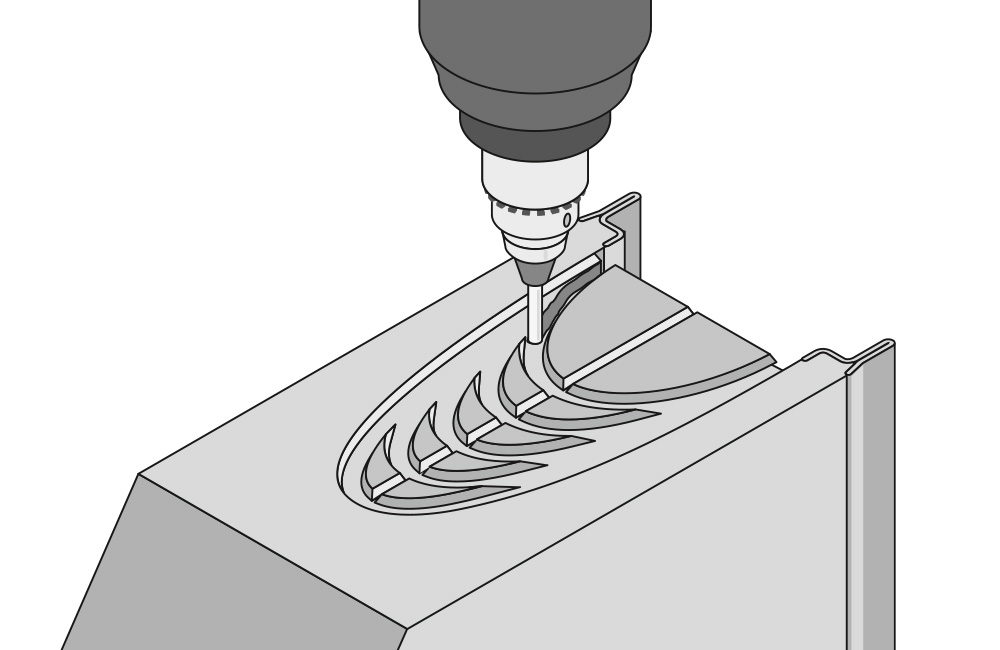
<h4><span class="text--medium text--dark">Option B: Using vertical and longitudinal outlets</span></h4><p>If no catch basin is used to evacuate the surface water, prepare pipe connections. To remove the cut hole or cut-out, follow these steps:</p><ul><li>Mark the zones to be removed.</li><li>Use a cut-off tool, band saw, or reciprocating saw to cut the opening to the required channel connection height (bracing may be needed)</li></ul><p>Now, use a core drill to <strong>remove the trench drain’s base or wall to fit the pipe.</strong></p><p> </p><p>Flip the channel bottom-side up and core drill the required opening. Next, use a grinder to dress or enlarge the opening for proper channel insertion. Finally, attach the no-hub bottom outlet to the channel bottom using the correct sealant.</p>

<p>vertical outlet core-drilling</p>
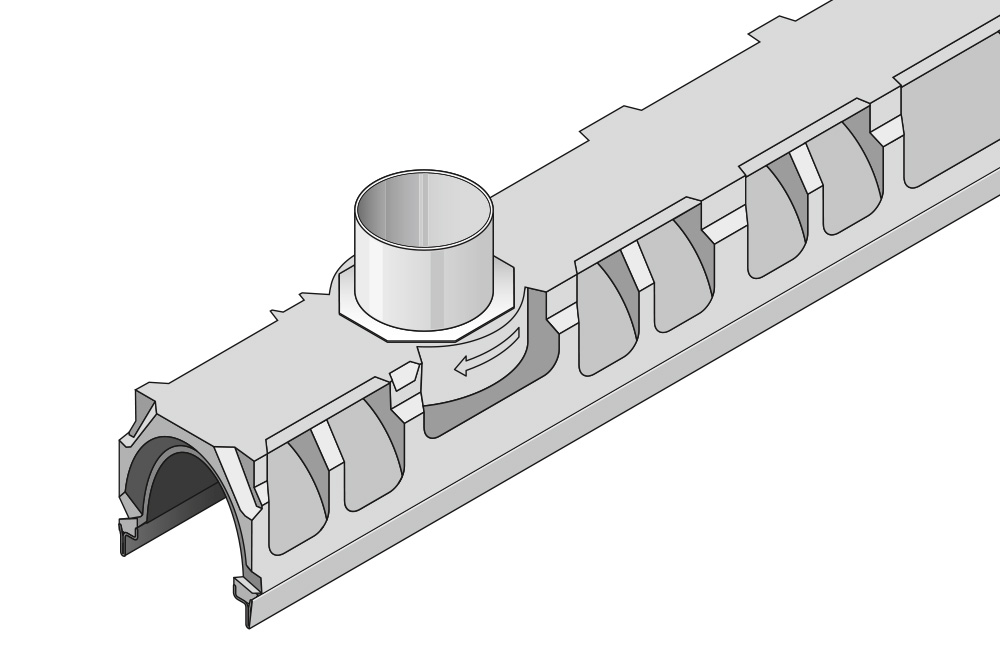
<p>positioning of outlet accessory</p>
<p>Finally, <strong>connect the trench drain with the underground piping.</strong></p>
<p><span class="text--height-big text--large"><strong>Note:</strong> </span><span class="text--height-big text--big">Do not hammer directly on the material when making penetration, as this might cause the surface surrounding the opening to crack. Always predrill with a core drill.</span></p>
<p>Position the end caps, bottom outlets, and end outlets on-site by fitting them to the channel and cutting the unwanted pieces. Use a sealant to fix these accessories.</p>

<p>end cap </p>
<p>longitudinal outlet</p>
<p>vertical outlet</p>
<p>Connect the channels directly to the underground piping using end caps, bottom outlets, end caps, or an in-line catch basin.</p>
<p><span class="text--large text--height-big"><strong>Remember:</strong> </span><span class="text--height-big text--big">Use chemically resistant sealant/adhesive for trench drains conveying corrosive liquids.</span></p>
<h4><span class="text--dark text--medium">Step 4: Position the Trench Drains correctly</span></h4><p>Now the pipes are connected appropriately, you need to position the trench drain. Assessing the gradients is critical. Start at the outlet point. Ensure the string line or laser level is set at the topmost margin of the specified channel height. Lay the channels in sequence by following the intended flow path of the liquid to be transported.</p><p> </p>
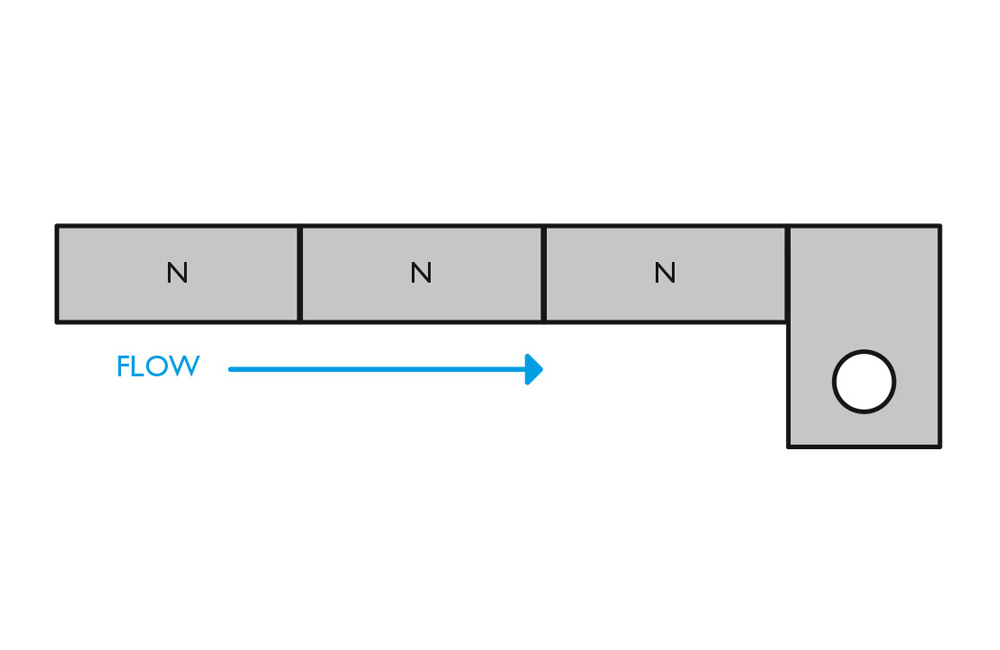
<p>neutral channel run</p>
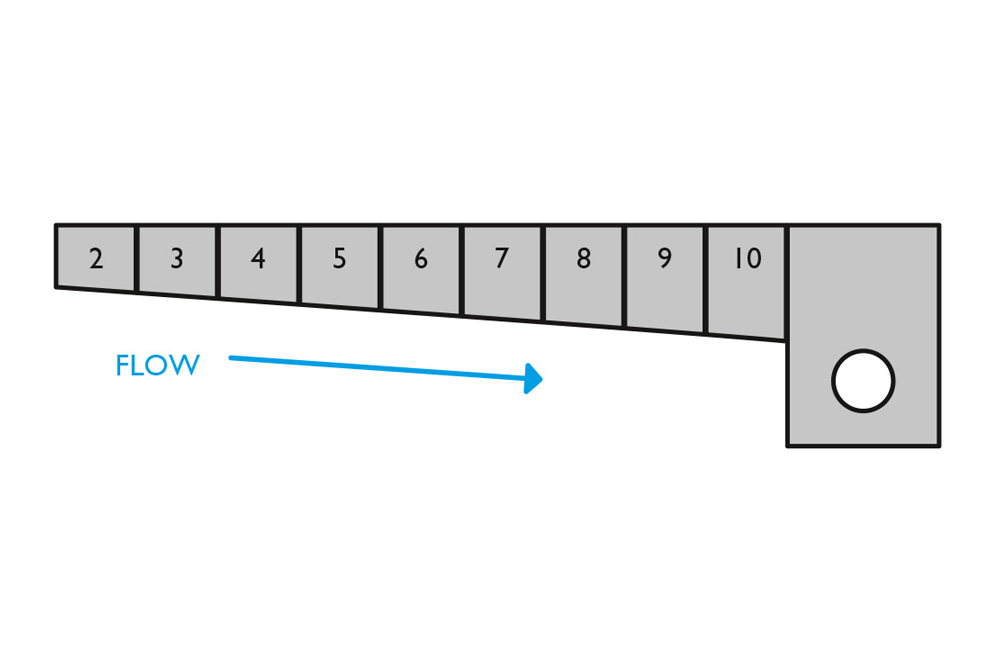
<p>sloped channel run</p>
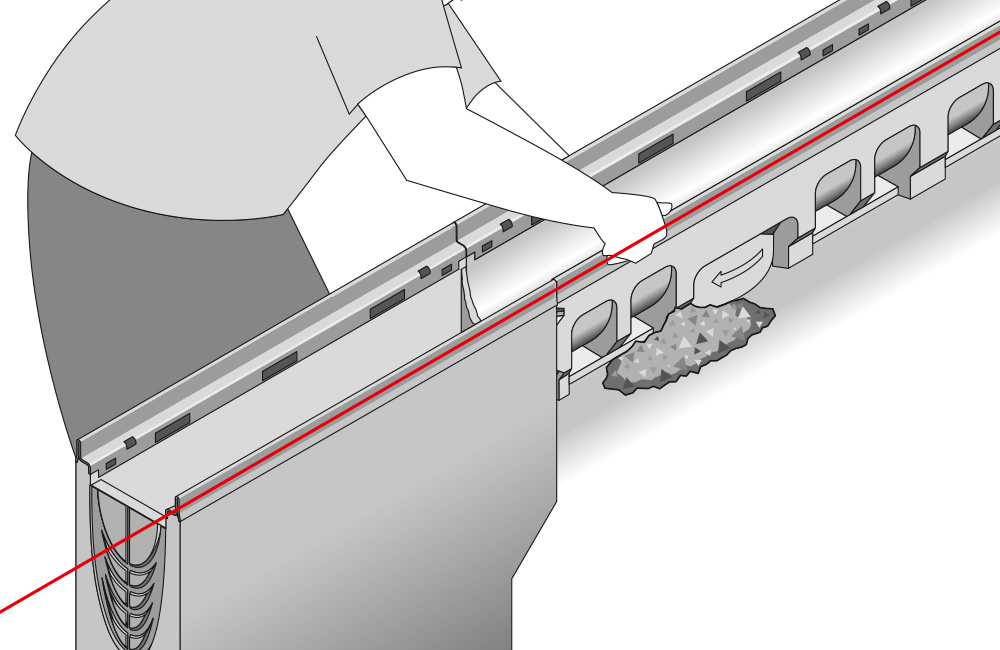
<p>BG FILCOTEN® makes it easy to position drains. Users push-fit channel segments together. Align the male and female ends, then push them together.</p><p>Popular channel placement and designs in the excavation include:</p>

<p>Patty Method</p>


<p>Mechanical Support Method</p>
<p>Suspension Method</p>
<p><a href="mailto: technical@bg-graspointner.com"><span class="text--white text--big"><u>Contact our technical team</u></span></a><span class="text--white text--big"> for more information on each method.</span></p>
<h3><span class="text--big">Step 5: Trench Drain Channel Bracing & Concrete Pour</span></h3><p>The next step is to fix the trench drain. This section has two components: bracing and concrete pouring.<br> </p><h4><span class="text--dark">Channel Bracing</span></h4><p>Place gratings in the grate recess of the channel to prevent drain channels from twisting out of shape due to the concrete load.</p><p>Wrap grates in plastic or masking tape to avoid concrete contamination. Place the grates to bridge the channel joints to help with alignment. Position shims/washers along one side to create and maintain a clearance gap.</p><p><strong>Note:</strong> Pouring planks can be used instead of the gratings.</p>
<p>plastic-wrapped grate before concrete pouring</p>

<p>concrete pouring plank</p>
<h4><span class="text--dark text--medium">Concrete Pouring</span></h4><p>Concrete must have a compressive strength of above 4,000 psi. If you intend to use the hanging method, ensure the first concrete lift rises approximately two inches up the channel sides.</p><ul><li>Pour the remaining concrete surrounding after the first fill has set.</li><li>Pour the concrete evenly on either side of the channel. This avoids dislodging the channels.</li></ul><p>Use a wand-type concrete vibrator to ensure the concrete spreads evenly underneath and on every side of the channel systems.</p>

<p>concrete pouring</p>
<h3><span class="text--medium">Step 6: Pavement finishing</span></h3><p><a href="/en-us/trench-drainage/bg-filcoten">BG-FILCOTEN® trench drains</a> feature gratings to suit multiple <a href="/en-us/bg-blog/load-classes-north-america">load class</a> applications. To dress the installation, smooth the concrete using a trowel and taper down to the channel edge.</p><p>Ensure the top of the bordering pavement is around 0.2 in (5 mm (0.2″)) above the grating level. This ensures liquids drain into the channel. Once the concrete sets, remove the bracing or grate protection. Install transverse joints or expansion joints along the channel to prevent surface cracking in the slab.</p><p> </p>

<p>asphalt compaction along trench drain</p>

<h2><span class="text--medium"><strong>BG-Graspointner Has the Ideal Trench Drain for Your Needs</strong></span></h2><p>Our scalable solutions offer superior drainage performance and versatility when designing trench drains. From pedestrian areas to logistics centres that endure heavy industrial use, <a href="/en-us/applications">BG-Graspointner’s trench drains suit multiple applications.</a></p><p><a href="/en-us/trench-drainage/bg-filcoten/pro">BG-FILCOTEN® pro P</a> is the latest release in the BG-FILCOTEN® pro product family. Made from recycled composite, this edging offers a compact, corrosion-free, color-stable solution.</p>
<p><span class="text--big">Contact the experts at BG-Graspointner to explore the best rainwater management solutions and modern trench drains. Let our team guide you on the perfect system for your situation.</span></p>